chalkline

Public teaching whiteboard

Raspberry Pi 5 home server — full setup

Turn a Pi 5 into a home server — storage, services, and setup on a free public whiteboard. · by zlu

Topics: Raspberry Pi tutorials

Raspberry Pi 5 home server — full setup

Session 04 · Build a Pi 5 home server

End-to-end home lab: hardware, OS, fixed IP, SSD, firewall baseline, then hand off to Session 05 for Dockerised services.

Target outcome

A quiet always‑on Pi 5 on your LAN that you can SSH into by a stable name/IP, boots from (or stores data on) an SSD, and is ready to host Pi‑hole / media / automation containers in the next session.

Shopping list (don’t skimp)

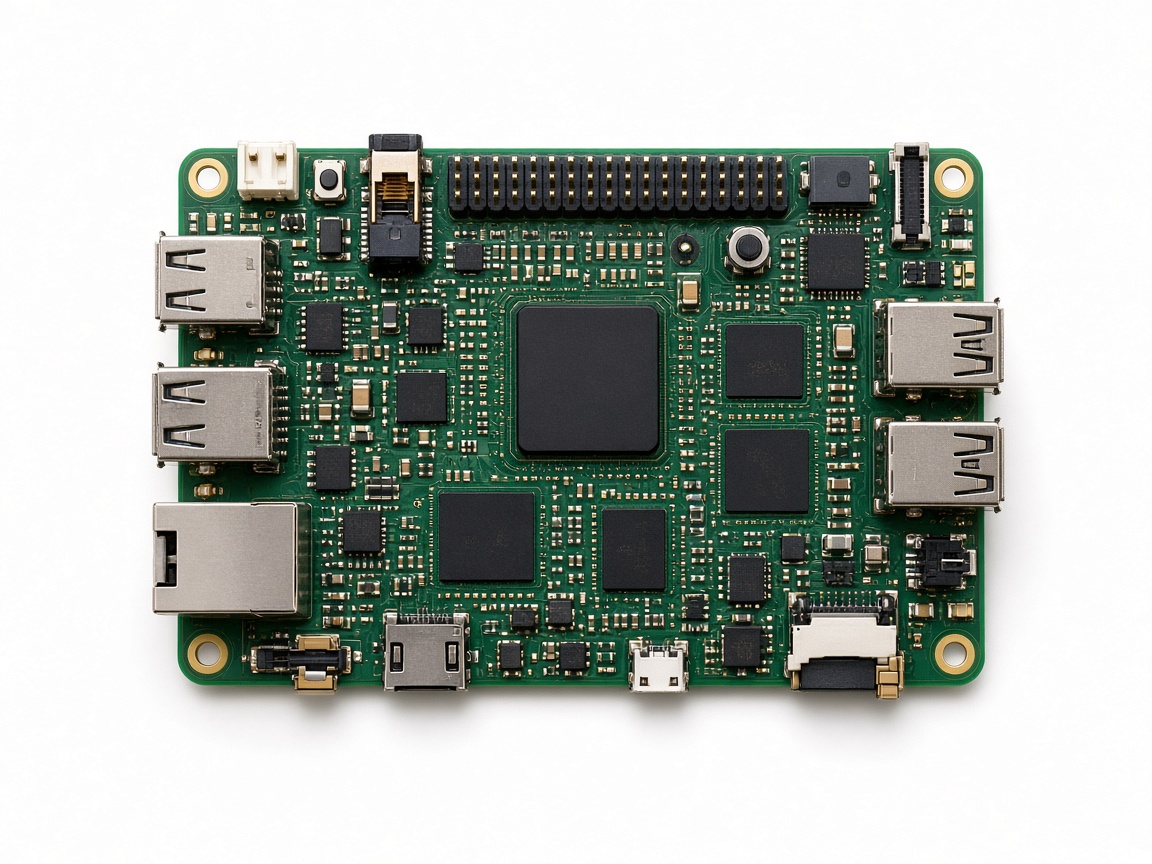
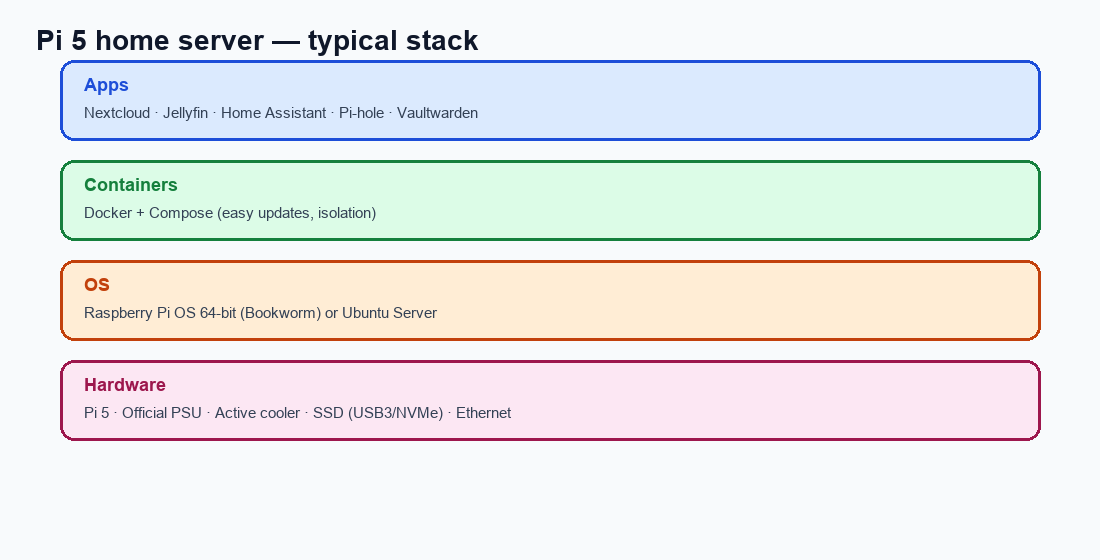
• Raspberry Pi 5 — 4GB min, 8GB nicer • Official 27W USB‑C power supply • Active cooler (or fan case) • Case with airflow • microSD for first boot (16GB+) • USB3 SSD (250GB+) OR NVMe HAT + SSD • Ethernet cable to your router • Optional: UPS / powered hub

Why each item matters

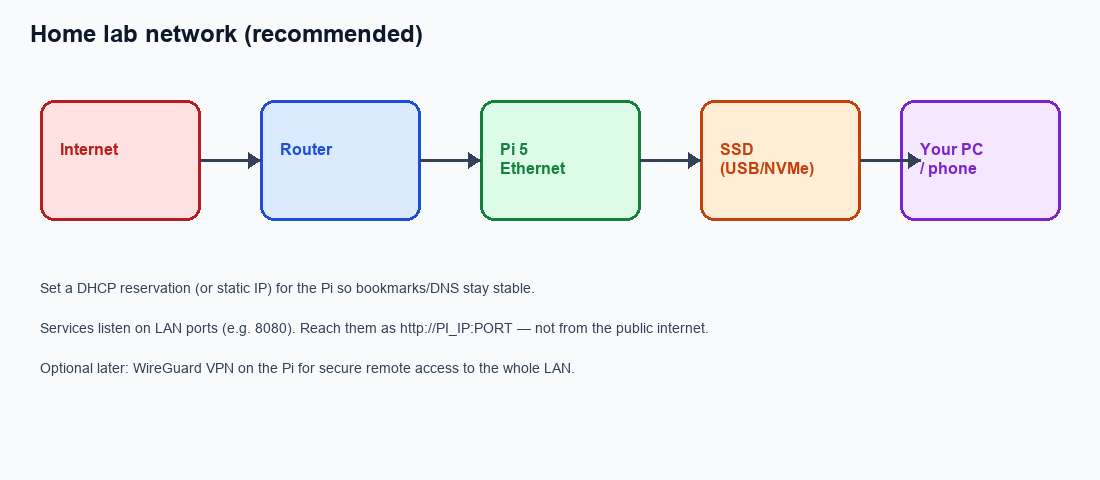
• Under‑powered PSUs → random crashes • No cooler → thermal throttle under Docker • SD cards wear out as databases rewrite → put Docker volumes / media on SSD • Ethernet beats Wi‑Fi for DNS & media • DHCP reservation → bookmarks never break

Step 1 — Flash & first boot (Ethernet recommended)

Use Session 01 Imager flow with these home‑server choices: • Device: Raspberry Pi 5 • OS: Raspberry Pi OS Lite (64‑bit) is ideal for a headless server (Desktop OS is fine if you want a local GUI) • Hostname: homeserver • Enable SSH + strong password or SSH key • You can skip Wi‑Fi if using Ethernet Boot with Ethernet plugged into the router. SSH: ssh piuser@homeserver.local

Step 2 — Update, hostname, and basic tools

sudo apt update && sudo apt full-upgrade -y sudo apt install -y git curl htop tmux unzip ufw fail2ban sudo raspi-config # System Options → Hostname → homeserver (if not set) # Performance → confirm fan/cooler behaviour as needed sudo reboot

Step 3 — Give the Pi a stable address

Best approach: in your router admin UI, create a DHCP reservation binding the Pi’s MAC address to e.g. 192.168.1.50. Find MAC / current IP on the Pi: ip -br link ip -br a Alternative (NetworkManager static IP) — only if you know your gateway/DNS: nmcli connection show sudo nmcli con mod 'Wired connection 1' \ ipv4.addresses 192.168.1.50/24 \ ipv4.gateway 192.168.1.1 \ ipv4.dns '1.1.1.1 9.9.9.9' \ ipv4.method manual sudo nmcli con up 'Wired connection 1' Verify from your laptop: ping 192.168.1.50 && ssh piuser@192.168.1.50

Step 4 — Attach and mount an SSD

# plug USB3 SSD, then: lsblk # suppose the disk is /dev/sda (NO trailing number yet) sudo apt install -y gdisk sudo parted /dev/sda --script mklabel gpt mkpart primary ext4 0% 100% sudo mkfs.ext4 -L pidata /dev/sda1 sudo mkdir -p /srv/data echo 'LABEL=pidata /srv/data ext4 defaults,nofail 0 2' | sudo tee -a /etc/fstab sudo mount -a df -h /srv/data sudo mkdir -p /srv/data/{docker,media,backups} sudo chown -R $USER:$USER /srv/data

Step 5 — Firewall baseline

Allow SSH first, then enable the firewall: sudo ufw allow OpenSSH sudo ufw enable sudo ufw status As you add web UIs in Session 05, open only what you need, e.g.: sudo ufw allow 8080/tcp comment 'pihole-web' sudo ufw allow 53 comment 'dns' Enable fail2ban defaults (already installed): sudo systemctl enable --now fail2ban

Step 6 — Unattended upgrades (optional but good)

sudo apt install -y unattended-upgrades sudo dpkg-reconfigure -plow unattended-upgrades Confirm: cat /etc/apt/apt.conf.d/20auto-upgrades

Session 04 checklist

☐ SSH via stable IP or homeserver.local ☐ Active cooler installed / temps OK (vcgencmd measure_temp) ☐ /srv/data mounted after reboot ☐ ufw active with SSH allowed ☐ Ready for Docker in Session 05 vcgencmd measure_temp ls /srv/data

Drag to pan · scroll to zoom · read-only

Board contents

Text extracted from this public whiteboard for search and accessibility.

Raspberry Pi 5 home server — full setup

Session 04 · Build a Pi 5 home server

End-to-end home lab: hardware, OS, fixed IP, SSD, firewall baseline, then hand off to Session 05 for Dockerised services.

Target outcome

A quiet always‑on Pi 5 on your LAN that you can SSH into by a stable name/IP, boots from (or stores data on) an SSD, and is ready to host Pi‑hole / media / automation containers in the next session.

Shopping list (don’t skimp)

• Raspberry Pi 5 — 4GB min, 8GB nicer • Official 27W USB‑C power supply • Active cooler (or fan case) • Case with airflow • microSD for first boot (16GB+) • USB3 SSD (250GB+) OR NVMe HAT + SSD • Ethernet cable to your router • Optional: UPS / powered hub

Why each item matters

• Under‑powered PSUs → random crashes • No cooler → thermal throttle under Docker • SD cards wear out as databases rewrite → put Docker volumes / media on SSD • Ethernet beats Wi‑Fi for DNS & media • DHCP reservation → bookmarks never break

Step 1 — Flash & first boot (Ethernet recommended)

Use Session 01 Imager flow with these home‑server choices: • Device: Raspberry Pi 5 • OS: Raspberry Pi OS Lite (64‑bit) is ideal for a headless server (Desktop OS is fine if you want a local GUI) • Hostname: homeserver • Enable SSH + strong password or SSH key • You can skip Wi‑Fi if using Ethernet Boot with Ethernet plugged into the router. SSH: ssh piuser@homeserver.local

Step 2 — Update, hostname, and basic tools

sudo apt update && sudo apt full-upgrade -y sudo apt install -y git curl htop tmux unzip ufw fail2ban sudo raspi-config # System Options → Hostname → homeserver (if not set) # Performance → confirm fan/cooler behaviour as needed sudo reboot

Step 3 — Give the Pi a stable address

Best approach: in your router admin UI, create a DHCP reservation binding the Pi’s MAC address to e.g. 192.168.1.50. Find MAC / current IP on the Pi: ip -br link ip -br a Alternative (NetworkManager static IP) — only if you know your gateway/DNS: nmcli connection show sudo nmcli con mod 'Wired connection 1' \ ipv4.addresses 192.168.1.50/24 \ ipv4.gateway 192.168.1.1 \ ipv4.dns '1.1.1.1 9.9.9.9' \ ipv4.method manual sudo nmcli con up 'Wired connection 1' Verify from your laptop: ping 192.168.1.50 && ssh piuser@192.168.1.50

Step 4 — Attach and mount an SSD

# plug USB3 SSD, then: lsblk # suppose the disk is /dev/sda (NO trailing number yet) sudo apt install -y gdisk sudo parted /dev/sda --script mklabel gpt mkpart primary ext4 0% 100% sudo mkfs.ext4 -L pidata /dev/sda1 sudo mkdir -p /srv/data echo 'LABEL=pidata /srv/data ext4 defaults,nofail 0 2' | sudo tee -a /etc/fstab sudo mount -a df -h /srv/data sudo mkdir -p /srv/data/{docker,media,backups} sudo chown -R $USER:$USER /srv/data

Step 5 — Firewall baseline

Allow SSH first, then enable the firewall: sudo ufw allow OpenSSH sudo ufw enable sudo ufw status As you add web UIs in Session 05, open only what you need, e.g.: sudo ufw allow 8080/tcp comment 'pihole-web' sudo ufw allow 53 comment 'dns' Enable fail2ban defaults (already installed): sudo systemctl enable --now fail2ban

Step 6 — Unattended upgrades (optional but good)

sudo apt install -y unattended-upgrades sudo dpkg-reconfigure -plow unattended-upgrades Confirm: cat /etc/apt/apt.conf.d/20auto-upgrades

Session 04 checklist

☐ SSH via stable IP or homeserver.local ☐ Active cooler installed / temps OK (vcgencmd measure_temp) ☐ /srv/data mounted after reboot ☐ ufw active with SSH allowed ☐ Ready for Docker in Session 05 vcgencmd measure_temp ls /srv/data